Difference between revisions of "Strain Relief Cable Gland"
From re:3D
| Line 11: | Line 11: | ||
Loosen six terminal screws where the head cable wires attach. *may need to loosen the upper six terminal screws as wire may be held by upper screws as well | Loosen six terminal screws where the head cable wires attach. *may need to loosen the upper six terminal screws as wire may be held by upper screws as well | ||
| − | |||
| − | |||
| Line 21: | Line 19: | ||
Unwrap spiral wrap. | Unwrap spiral wrap. | ||
| − | [[File: | + | [[File:4.jpg]] |
Remove cable grommet and head cable from in the head junction box. | Remove cable grommet and head cable from in the head junction box. | ||
* The flex cable gland is shown; some Gigabots may have a regular cable grommet in it’s place. | * The flex cable gland is shown; some Gigabots may have a regular cable grommet in it’s place. | ||
| + | |||
| + | [[File:5.jpg]] | ||
| + | |||
| + | |||
[[File:6.jpg]] | [[File:6.jpg]] | ||
Open electrical box door and loosen head cable wires from the Azteeg | Open electrical box door and loosen head cable wires from the Azteeg | ||
Revision as of 21:33, 9 January 2015
Head cable replacement instructions:
For safety we're going to turn off the Gigabot and unplug the machine from the wall. Move the extruder to the front of the machine.
Remove four screws from the cover of the head junction box.
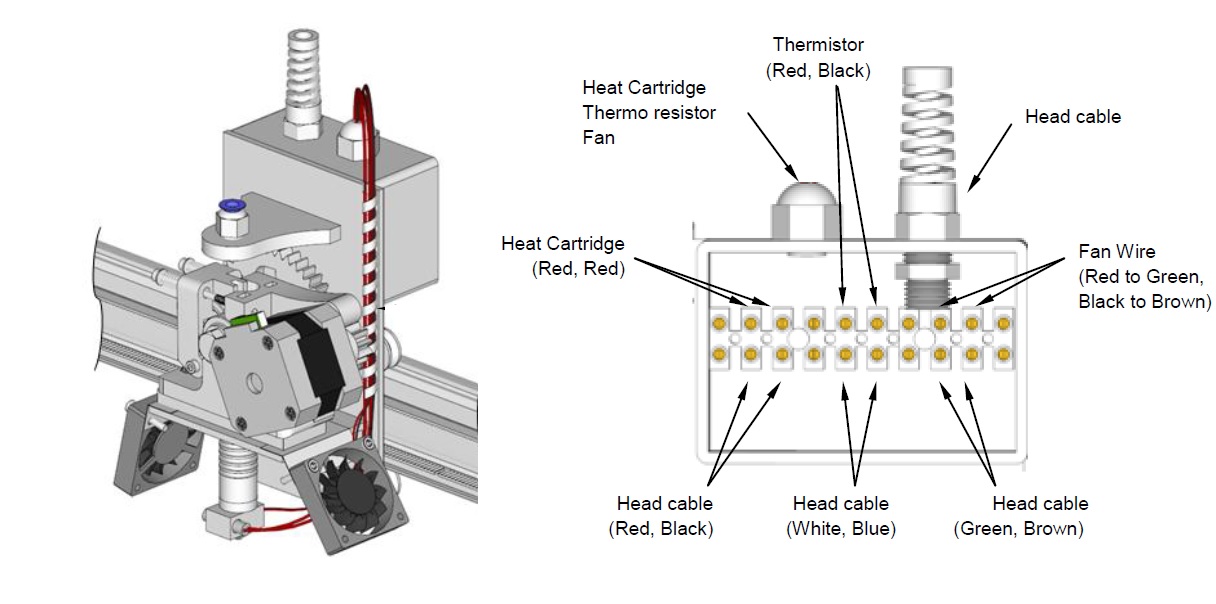
Loosen six terminal screws where the head cable wires attach. *may need to loosen the upper six terminal screws as wire may be held by upper screws as well
Remove covers from vertical and horizontal Panduit.
Unwrap spiral wrap.
Remove cable grommet and head cable from in the head junction box.
- The flex cable gland is shown; some Gigabots may have a regular cable grommet in it’s place.
Open electrical box door and loosen head cable wires from the Azteeg


