Getting a good print
Contents
Tips and tricks to 3D printing
Additive manufacturing is not a magical process. The physics of classical mechanics, thermal dynamics and fluid mechanics are all fairly well understood. The difference between traditional (subtractive) manufacturing and 3D printing (additive) manufacturing is the application of the physics involved. Below is a study of the science and art of physics applied to 3D printing.
Importance of the first layer
The layer wise building process of 3D printing relies on a flat building surface. The first layer deposited on the build plate is the foundation for your print.
Detailed instruction on these three steps can be found here: Calibrating your Gigabot
- Taking the time to ensure the build plate is flat and parallel to the head movement
- Setting the Z home position for the build plate
- Calibrating the filament feed rate
Filament not sticking to the print surface
Does the filament peel up and sticks to the hot-end? The reason it is curling up and sticking to the hot-end is because it is not sticking well enough to the bed. A number of possible reasons why this could happen on the first layer:
- Z axis home position too low? (measure the first layer thickness and compare to Simplify3D)
- Material requires gluestick on the bed for proper adhesion (PETG, PVA, PolyCarbonate)
- Clean print surface with isopropyl alcohol (Necessary for ABS)
- First layer height too thick? (max thickness = 1.5 x nozzle diameter )
- Print temp too low (200-210C for PLA and 230-240C ABS)
- Print speed too high (15 - 20 mm/sec)
Using the Brim Feature
To help fight the warping and curling of your model as the plastic cools and shrinks you can add a brim to the base of your part. The brim gives your model greater ability to hold to the print surface.
You can turn on the brim feature in Simplify3D. Go to Edit Process Settings -> Layer -> Skirt Settings (Check box)
- Skirt Layers = 1
- Skirt Offset = 0mm
- Skirt Outlines = between 5-10
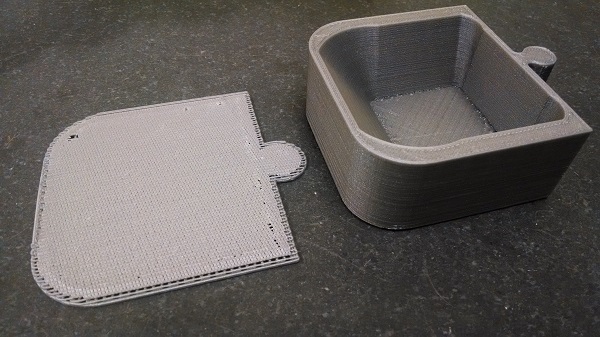
Printing on a raft
You can use the raft feature in Simplify3D and Slic3r to create the perfect print surface. The filament you are printing with will adhere to itself better than it adheres to anything else. This is a great reason to build a raft under your part.
You can turn on the raft feature in Simplify3D in the Edit Process Settings -> Layer -> Raft (Check box)
- Raft Layers = 1
- Raft offset = 3mm
- Separation = 0.22mm - 0.25mm
- Raft Infill = 80% - 85%
Printing overhangs
There are two things that will help in printing overhangs without support material
- Increasing the filament extrusion rate (3-5% over extruding)
- Increasing the number of perimeters in the slicing parameters (3-5 perimeters)
Printing narrow tall objects
It sometimes happens that printing tall thin objects will result in poor print quality. This happens when there is too much heat being applied to a small area and the plastic is not cooled quickly enough. Visual indications of too much heat in the print:
- Curling of the edges and not maintaining a flat top layer
- Sagging of the plastic
To fix-
- Print multiple objects at the same time
- Increase the minimum time for each layer:
- Slic3r -> Filament Settings -> Cooling -> Cooling Thresholds -> Slow down if layer print time is below
- Simplify3D -> Edit Process Settings -> Cooling -> Speed override -> Adjust printing speeds for layers below
- Reduce the minimum print speed:
- Slic3r -> Filament Settings -> Cooling -> Cooling Thresholds -> Min print speed
- Simplify3D -> Edit Process Settings -> Cooling -> Speed override -> Allow speed reductions down to
- Reduce the hot-end temperature
Setting the retraction distance
Retraction of the filament at the print head helps to control the ooze of melted filament during a not print move. The retraction distance is normally set between 0mm -> 4mm. The goal is to set the retraction as low as possible to reduce retraction time and reduce nozzle clogging problems associated with over-retraction but yet setting the retraction value high enough to prevent oozing of the hot-end.
If during your print the hot-end does not cross the exterior boundary of your model you may find it beneficial to set the retraction value to 0mm. If your model is small and any non-print moves of the head are very short the retraction value of 1-1.5mm may be enough. If the model is large and non-print moves crossing the outer boundary of your model are large then 3-4mm or retraction may be necessary.
Diagnosing print problems
- If the print quality is suffering first slow down the print speed. This will help you to determine the nature of the problem. Information determined by watching the print process will be easier to see when printing slower.
Hot-end is too cold
The hot-end temperature for PLA should be between 185-220C. Increase temperature for:
- Thicker layers
- Faster print speed
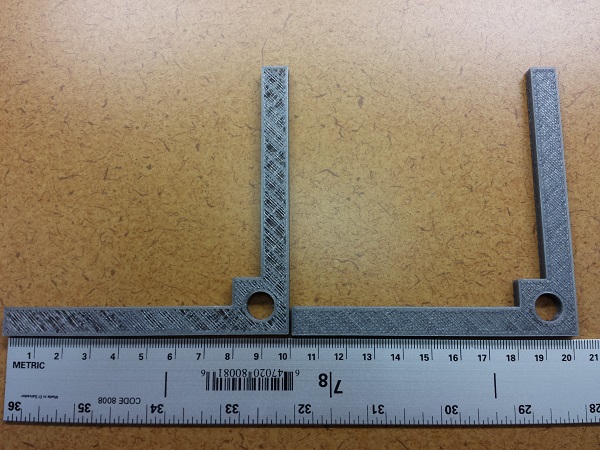
Image below, Part on left was printed with hot-end temperature too low:
