Difference between revisions of "First Print"
From re:3D
(→Using Simplify3D) |
(→First Print) |
||
| Line 1: | Line 1: | ||
===First Print=== | ===First Print=== | ||
| − | + | Workflow: | |
| − | + | #Start with 3D CAD model in .stl file format. | |
| + | #Use Simplify3D or Slicer to process the model and export the G-code instructions for Gigabot | ||
| + | #Use Pronterface to either: | ||
| + | ##Feed the G-code instructions to Gigabot | ||
| + | ##Start the print from Gigabot's on-board microSD card | ||
====Using Simplify3D==== | ====Using Simplify3D==== | ||
Revision as of 13:24, 4 September 2014
First Print
Workflow:
- Start with 3D CAD model in .stl file format.
- Use Simplify3D or Slicer to process the model and export the G-code instructions for Gigabot
- Use Pronterface to either:
- Feed the G-code instructions to Gigabot
- Start the print from Gigabot's on-board microSD card
Using Simplify3D
- Download the File:20mm-box.stl
- Open Simplify3D and import the 20mm-box.stl
- Check that the Gigabot settings are selected and active in Simplify3D.
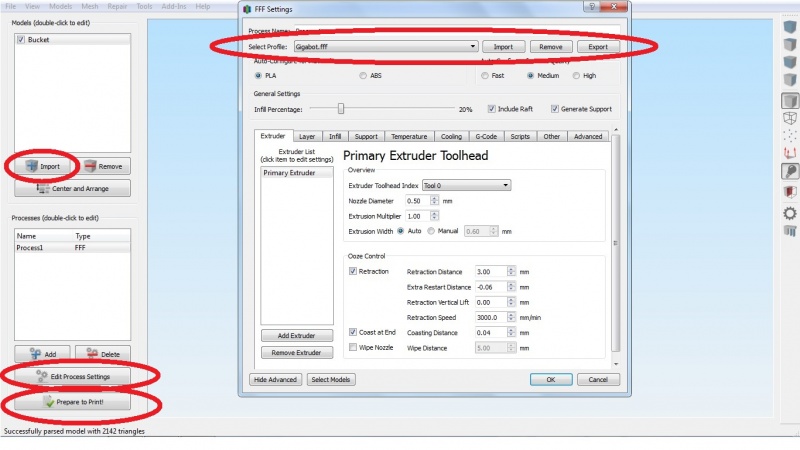
- From the main screen in Simplify3D click on "Prepare to Print" button
- Save the G-code file to your computer
- Open Pronterface and connect to Gigabot
- In Pronterface click on "Load File" and open the G-code file generated by Simplify3D under "Edit Process Settings".
- The tool path will show in the Pronterface preview window
- Click "Print" and Gigabot will begin heating the bed, then heating the hot-end and then begin printing.

OR
Using Slic3r
- Download the File:20mm-box.stl
- Open Slic3r and import the 20mm-box.stl
- Check that the Gigabot settings are selected and active in Slic3r
- From the main screen in Slic3r click on Export G-code
- Save the G-code file to your computer
- Open Pronterface and connect to Gigabot
- In Pronterface click on Load File and open the G-code file generated by Slic3r.
- The tool path should show in the Pronterface preview window
- Click "Print" and Gigabot will begin heating the bed, then heating the hot-end and then begin printing.