Difference between revisions of "Installing and using software with Gigabot"
(→Slic3r) |
|||
| Line 62: | Line 62: | ||
:Download Slic3r settings to your local computer.: | :Download Slic3r settings to your local computer.: | ||
| − | ::GB2 | + | |
| − | ::GB3 | + | :[https://www.dropbox.com/s/lr3610swrwrzckp/GB2%20config.ini?dl=0 GB2]. |
| + | |||
| + | :[https://www.dropbox.com/s/t0wcgn1m024xuil/GB3%20config.ini?dl=0 GB3 Single]. | ||
| + | |||
| + | :[https://www.dropbox.com/s/banr9ch6xnlazbl/GB3-DE%20config.ini?dl=0 GB3 Dual]. | ||
:Open Slic3r and go to File -> Preferences -> Mode -> Expert | :Open Slic3r and go to File -> Preferences -> Mode -> Expert | ||
Revision as of 14:59, 9 May 2016
Contents
Install software
Gigabot is fully compatible with open source programming tools supported by the RepRap community (http://reprap.org/).
Download and install:
- USB to serial driver
- Simplify3D or Slic3r
- Pronterface
USB to serial driver
The Virtual Communications Port driver is a piece of software that allows your computer to communicate with your Gigabot using USB.
- Download and install the VCP driver for your specific operating system.
- You may need administrator rights, or need to right click and "Run as Administrator".
Simplify3D
- Click here to purchase: Simplify3D
More Resources
- http://www.simplify3d.com/support/
- https://www.youtube.com/channel/UCQP0KuWKndRvvTbLVYWZXnQ
- Helpful tutorials: http://www.simplify3d.com/support/tutorials/
Gigabot configuration
- After installing Simplify3D -
- Click one of the following links:
- In the new window right click on the link at the top of the page and choose "save link as"
- This will download the file to your computer.
- Open Simplify3D.
- Go to File -> Import .fff Profile
- Choose the updated .fff configuration file for your machine
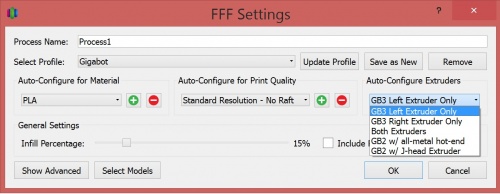
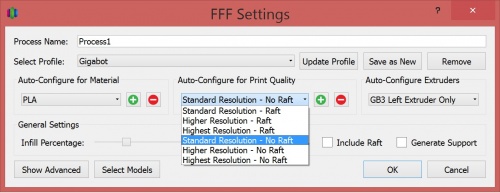
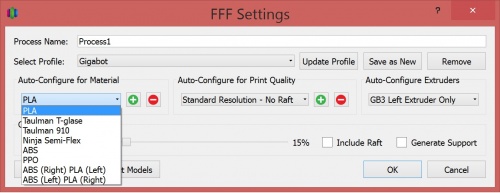
Three steps to choosing your settings:
Gigabot Model for Simplify3D File:Gigabot Frame.stl
Dual Extrusion Settings
Here is the factory file for printing with dual extrusion. Please note you may have to adjust the "Toolhead offsets" for tool 1 under the G-Code tab in the .fff settings.
Slic3r
Slic3r takes a 3D model (usually an .stl file) and turns it into G-code. G-code is the instructions for the 3D printer to create the part. A more detailed understanding of G-code can be found on the RepRap wiki.
- Download and install Slic3r.
- Read the complete Slic3r manual
- Download Slic3r settings to your local computer.:
- GB2.
- Open Slic3r and go to File -> Preferences -> Mode -> Expert
- Click OK and follow prompt to restart Slic3r
- Once you have restarted Slic3r go to File -> Load Configuration
- Choose the Gigabot_Slic3r_config.ini configuration file you saved earlier
Printrun (Pronterface)
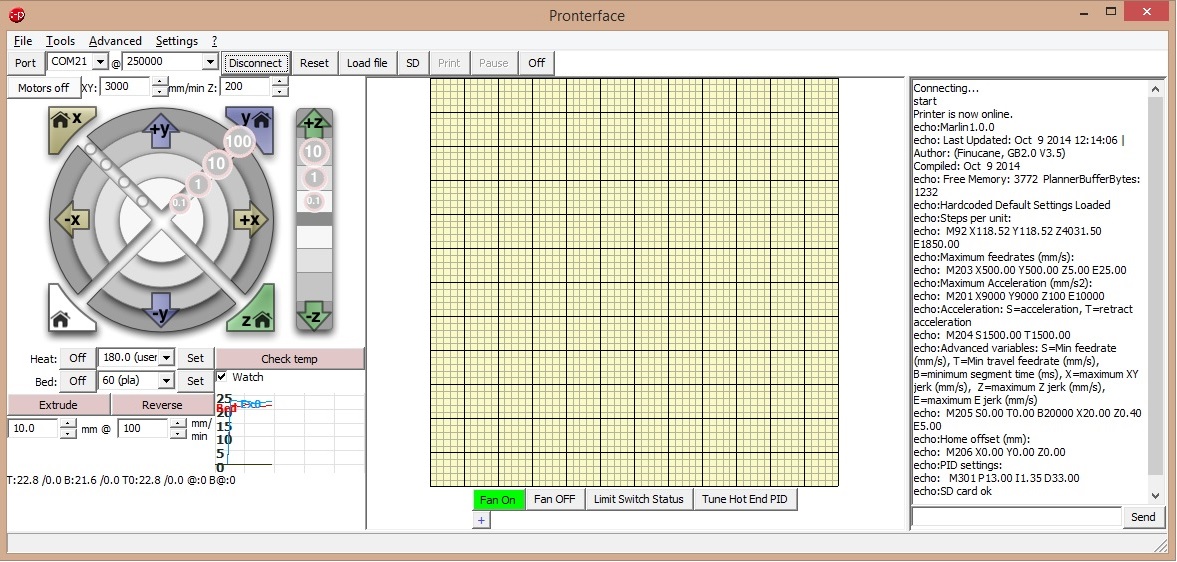
This program is the interface you will use to communicate with Gigabot. Once the 3D model (.stl) has been turned into G-code, it must be feed into the printer. This can be done by loading the G-code file onto a micro SD card and inserting it into Gigabot's Viki controller or feeding it from your computer to Gigabot via Pronterface. More information on Pronterface can be found Here
- Download and install Printrun for Windows or Mac.
- Open Pronterface and go to Settings -> Options
- Under the Printer Settings tab change:
- Baud rate to 250000
- Bed temp for PLA to 65
- Extruder temp for PLA to 195
- X and Y manual feed rate to 6000
- Z manual feed rate to 200
- E manual feed rate to 100
- Width, Depth and Height to 600
- Click OK then restart Pronterface for the changes to take affect
Connecting to Gigabot
- Turn on Gigabot
- Plug the USB cable into your computer
- Open Pronterface and click on the 'Connect' button at the top left of the main screen
- Once connected the dialog box on the right side of the screen should say 'Printer now online'
- On the left side of the screen near the "Check Temperature" button activate the "Watch" check box
Testing the X, Y, and Z limit switches
- Open Pronterface
- In the lower-right corner, type the G-code command "M119" to check the limit switches. All switches should return "OPEN".
- Using your finger, individually depress each limit switch lightly until it clicks. Hold this position and resend the "M119" command.
- X_MIN will change to "Triggered"
- Y_MAX will change to "Triggered"
- Z_MIN will change to "Triggered"
Moving the X and Y and Z axis
- In the Pronterface control panel click on the +x 10 button to move the print head to the right 10mm.
- Note: Calibrate the bed using the Calibrating your Gigabot instructions before homing the Z axis


